

Sunday, September 30, 2012
Parents' Weekend
Hello readers! This week we've been busy because Chris' parents are in town. I might have a smaller project for you later this week, but for now, some recent fall photos from colorful Colorado. Next week, the chair project continues and we have something else exciting in the works.

Wednesday, September 26, 2012
Upholstering a Chair, Part 1
This is our first big project, and by most people's standards, it's not that big. But as newbies to the DIY scene, this was quite the undertaking.
At a yard sale several weeks ago we bought a chair and haggled for a very cool chair frame. We've been searching for the right fabric before starting the project, but over the weekend we found it at a thrift store, so here we go.
We have no idea how many parts this will be or how it will turn out. It will be a surprise for all of us, but of course we'll document the whole thing. For now, here is part one.
You need: A chair frame, plywood, fabric, a foam cushion, cotton batting, & welting (or trim) - as well as some tools, a drill, a saw, clamps, scissors and a sewing machine.

The chair frame we had was old and a bit wobbley, so first, Chris reinforced the chair. He simply put screws through the base frame into the legs.

Because the chair we decided to upholster had no base or back, we had to cut them out of plywood before adding fabric.
 To do this, Chris used a piece of cardboard to trace the shape of the chair's back.
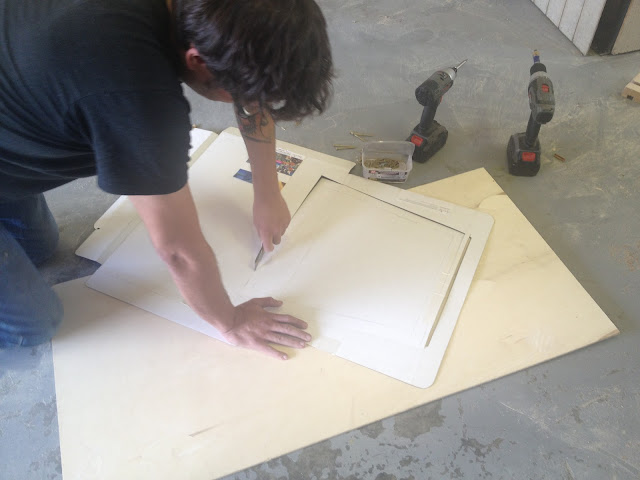 He then cut it out with a knife then, once he was sure that it was the right size, traced it onto the plywood. Once it was traced onto the wood, he used a saw to cut it out and sanded the edges.

The back of the chair is curved a bit, so we had to clamp the piece of plywood Chris just cut to the chair. Then we sprayed it with water and let it sit. The plywood will form to the curve after it dries.
 We stopped there and will be back with part two next week. Check back and thanks for following along!
At a yard sale several weeks ago we bought a chair and haggled for a very cool chair frame. We've been searching for the right fabric before starting the project, but over the weekend we found it at a thrift store, so here we go.
We have no idea how many parts this will be or how it will turn out. It will be a surprise for all of us, but of course we'll document the whole thing. For now, here is part one.
You need: A chair frame, plywood, fabric, a foam cushion, cotton batting, & welting (or trim) - as well as some tools, a drill, a saw, clamps, scissors and a sewing machine.

The chair frame we had was old and a bit wobbley, so first, Chris reinforced the chair. He simply put screws through the base frame into the legs.

Because the chair we decided to upholster had no base or back, we had to cut them out of plywood before adding fabric.


The back of the chair is curved a bit, so we had to clamp the piece of plywood Chris just cut to the chair. Then we sprayed it with water and let it sit. The plywood will form to the curve after it dries.

Sunday, September 23, 2012
Key Holder Using Old Keys
Chris & I had a busy weekend of DIYing and estate sale browsing. We take on so many projects that it seems like a normal day for us is two for most people. Anyway, we got a lot done. Here is a quick project, but later this week we'll be posting part one of a bigger project.
Do you often lose your keys? I definitely do. Well, not lose, but misplace. And Chris tends to leave his keys just about anywhere. So, thanks to Pinterest, we were inspired to make a key holder - with old keys!
 You need: old keys (you can get some here), a piece of wood (distressed, if possible), screws, pliers and a drill
First, if your piece of wood is too long, cut it to the size you'd like. We made ours about 8 inches and used 4 keys.

Using 2 plies, bend the bottom of the key upwards to create a curved hook.

Once you've done this with all four (or however many you choose to use) keys, attach them to the wood.

And you're finished with the front!

To hang your key holder without using string or visible hooks, use a drill to create holes in the back of the piece of wood.

Then you'll be able to put nails in the wall and simply hang this on them.


And there you have it! A pretty cool looking place to hang your keys, or anything that you need in a handy place. I love the rustic look of this so much! It is indeed possible to combine style with function.

Sunday, September 16, 2012
Tips & Tricks.
Hello readers! With Chris away, I ended up not working on any projects, but I did go to some estate sales. Because thrift stores, yard sales and estate sales are where we get most of our inspiration and supplies for projects, I thought I'd share some tips and tricks.


.jpg)


.jpg)

- Plan ahead. Look on Craigslist.org, or one of my favorite sites, estatesales.net, for a listing. You're likely to get better deals at an Estate Sale because the family is trying to get rid of everything. Pick out the sales you want to stop at and rank them - go to the one you think will be most successful first.

- Know what you're looking for. It doesn't have to be incredibly specific, but at least know what type of furniture you are looking for. I usually go looking for specific types of vintage jewelry and pyrex. Chris and I have been in search of a coffee table, so I kept an eye out for that too. Without somewhat of a plan, you'll get overwhelmed or buy things you don't need.
.jpg)
- Don't be afraid to negotiate. I find it easiest when I'm buying several things, I'll just see if they'll take a price that is rounded down. This is much easier late in the day, rather than early in the morning. At the end, when they are closing up, they just want to get rid of everything.

- Get up early! You'll find the best things if you show up right when the sale starts. This is also a smart move when it comes to thrifting to, you'll get first pick at the newly added items.

- When thrifting, know when the sales are - you'll get some even better deals! Our thirft store does 50% off just about every Saturday, so we make sure we go then.

- If you're looking in a thrift store for vintage clothes and shoes, this time of year they sometimes put it in the Halloween section, so don't forget to look there.

- Another quick thrifting tip - if you're looking for clothes, ignore what size the tag says and make sure you try everything on. Vintage clothes sizes run differently than most current brands.
.jpg)
- Make connections! It's great to get the seller's contact info and share yours, let them know what you look for and have them contact you if they find more that they want to get rid of. I do this often with vintage buttons - many people have some that they will give you for free just to get it out of their house. Also, make connections with other shoppers at the sale, they may be collectors who have items that you're looking for.
Good luck searching for treasures and share your own tips with us!
Thursday, September 13, 2012
Scrabble Tile Coasters
This project is all over Pinterest, but Chris and I wanted to make it as a gift for his brother and sister-in-law.
They love games and actually had a Scrabble themed cake at their wedding.

Living 2,000 miles away from family has inspired me to send more letters and packages. Yes, I'm bringing back snail mail. This seemed like the perfect little gift to send them.
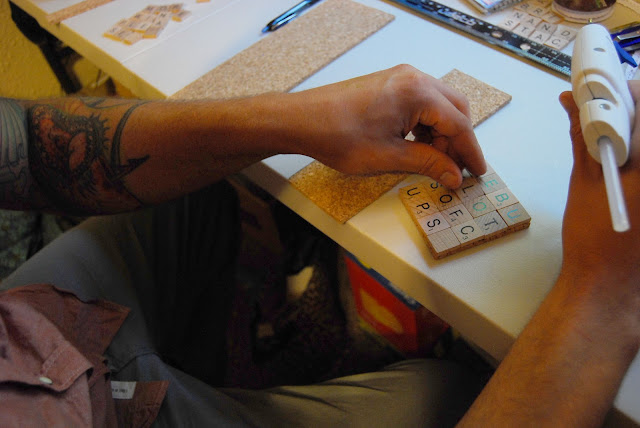
The supplies: Scrabble tiles (you can get these on Ebay), cork, a ruler, a razorblade and hot glue.

The fun and most time consuming part of this project is deciding what you want your coasters to say. Choose four letters across and four down. We utilized the blank tiles when our sayings weren't quite long enough.

Once you have the tiles laid out, measure them so you know what size to cut the cork squares.

Use the razorblade to cut out squares that are the same size as your four by four Scrabble tiles.

Flip the tiles over, but be careful not to mess up the order. Then, place glue on the piece of cork.

Quickly, so the glue doesn't dry, place it on the back of your Scrabble tiles and press down.
Make sure all of the tiles are secure, if any fall off, add more glue and replace them.

And you're finished! Lastly, I tied a ribbon around them before putting them in the mail.

That concludes are mini project week, although I'm sure there will be more in the future! Chris is off to a tattoo convention, so our posts next week might be done completely by me - we'll see. Have a good weekend and let us know if you try any of these projects out!
Tuesday, September 11, 2012
Repurposed Fork Soap Dish
Our friends in New Mexico had a soap holder like this and Chris & I decided to make our own. This would also be the perfect little housewarming gift.
We were thinking of a couple of projects using old silverware, so we bought a bag of it at a thrift store.

First, bend the two outermost prongs away from the middle.


Then you want to bend about halfway down the handle. Then bend up again about halfway from the first bend and the end of the handle.
If that sounds super confusing, here is a photo of how it should look.

Then, simply add a small bar of soap!

Sunday, September 9, 2012
Animal Magnets
Chris is dealing with some major tooth pain, so my idea was to plan some little projects that I wouldn't really need him to help with. Of course, he ended up deciding he wanted to do most of the work, so I just assumed the role of photographer.
So, this week we have three easy projects that would make great gifts! I don't know about you, but it seems like many of our friends are buying a home, getting married or having a baby. These are cute, inexpensive and fun things you could make for just about anything you need a small gift for. You don't have to be made of money to send something thoughtful!
Here is the first of three - Animal magnets, which I'm sure you've seen on Pinterest (or fun sites like FredFlare.com). If you haven't, this is a great idea that we came up with! Just kidding, I can't steal the credit. Anyway, onto the instructions.

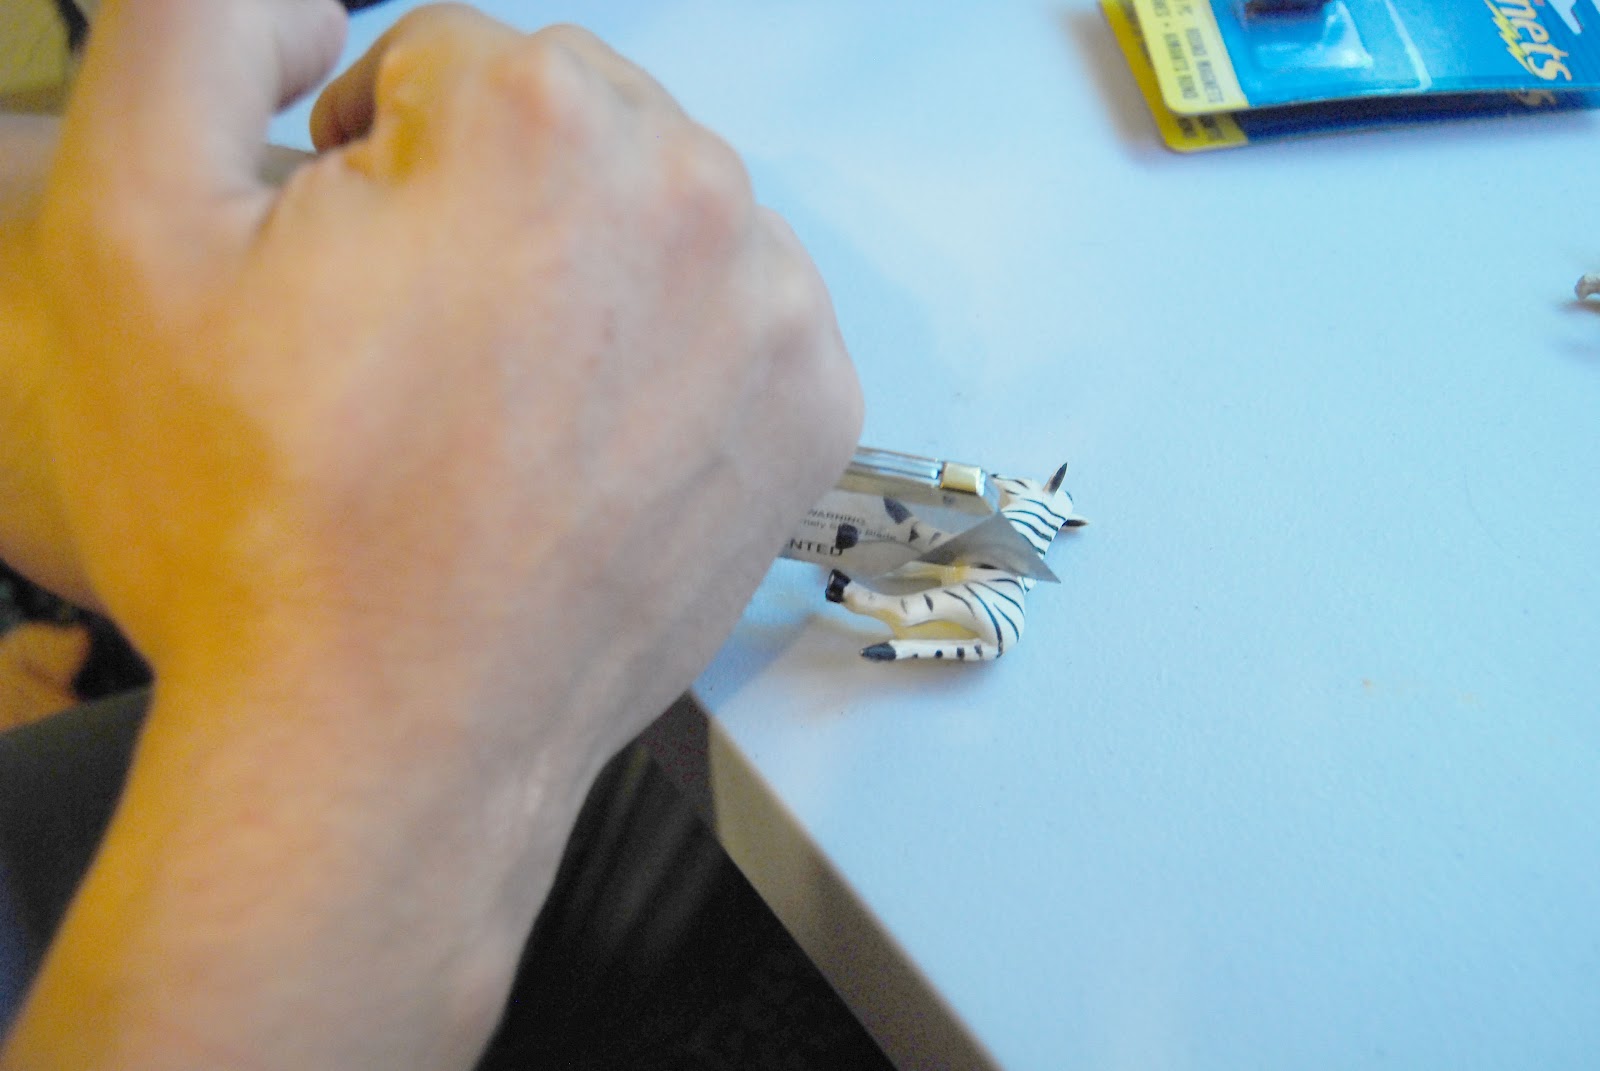
On Saturday we went to a couple craft sales and antique markets, and while we were exploring we can across these little guys. The four of them cost us $2, but you could also find some at any toy or dollar store. Once you have the plastic animals, all you need is a pocket knife, small circle magnets and super glue.

The instructions are simple, first, cut the animals in half (as cruel as it may seem).


Then, glue the magnets onto the flat back part of each animal half. We recommend super glue, because hot glue won't hold as well.


Thanks for reading! Stay tuned for more mini-projects later this week.
So, this week we have three easy projects that would make great gifts! I don't know about you, but it seems like many of our friends are buying a home, getting married or having a baby. These are cute, inexpensive and fun things you could make for just about anything you need a small gift for. You don't have to be made of money to send something thoughtful!
Here is the first of three - Animal magnets, which I'm sure you've seen on Pinterest (or fun sites like FredFlare.com). If you haven't, this is a great idea that we came up with! Just kidding, I can't steal the credit. Anyway, onto the instructions.

On Saturday we went to a couple craft sales and antique markets, and while we were exploring we can across these little guys. The four of them cost us $2, but you could also find some at any toy or dollar store. Once you have the plastic animals, all you need is a pocket knife, small circle magnets and super glue.
The instructions are simple, first, cut the animals in half (as cruel as it may seem).


Then, glue the magnets onto the flat back part of each animal half. We recommend super glue, because hot glue won't hold as well.
And there you have it! A fun addition to any fridge and what could be a fun housewarming gift. Our roommates are really enjoying these. We also had some fun while we were making them...


Thanks for reading! Stay tuned for more mini-projects later this week.
Monday, September 3, 2012
Vintage Spool Necklace Display
Hello! We spent the long weekend visiting our good friends, and their cute little pups, in New Mexico. We ate delicious food, caught up with our friends and explored both Albuquerque and Santa Fe. New Mexico is beautiful! The trip was fun, but we had no time to DIY, but I do have a project from a few weeks ago for you. Also, here are some Instagram pictures from the weekend.

.jpg)
.JPG)
.JPG)
.JPG)

.JPG)


If you have some old spools and necklaces to hang, this is a great project. I love making things that are practical for organizing our home as well as pretty to look at. Let us know if you try this out!

This project was originally posted on Oh, Sweet Joy!, a local Boulder blogger who I met when I moved out here. I took over one of her Handmade Monday features with this necklace display project made from vintage spools.
First, the supplies: A piece of plywood, a picture frame, screws, a power drill, a staple gun, fabric and vintage spools.
Once you choose the picture frame, you will need to either find a piece of wood that fits in it or cut it to size.
When the wood is cut to size, cover it with the fabric of your choice! Cut of the extra and use a staple gun to secure it. You can also try using hot glue. You're also going to be using the staple gun, or hot glue, to secure the fabric covered piece of wood in place as well.
Once that part is finished, get your spools and lay them out where you'd like them to be. I chose a zig zag pattern so I could have a place both my long and short necklaces.
Once you are satisfied with their placement, use a power drill to secure.
Hang this the way you're hang a picture - I used wire on the back of the frame.
And you have your finished necklace holder! The last step, of course, is to hang your necklaces on the spools.


If you have some old spools and necklaces to hang, this is a great project. I love making things that are practical for organizing our home as well as pretty to look at. Let us know if you try this out!
Subscribe to:
Posts (Atom)